
How to Install a Modular Green Roof: A Step-by-Step Guide
If you’re looking to create an attractive, low-maintenance and eco-friendly green roof for your home or project, our modular green roof system is the perfect solution. Designed for straightforward DIY installation, our pre-grown sedum trays make it easy for homeowners, builders, and contractors across the UK to install a professional-quality living roof in no time at all.
In this step-by-step guide, we’ll explain exactly how to install your sedum roof trays — from the moment they arrive on site to the moment your new green roof is flourishing.
1. Before Delivery: Preparing for Your Green Roof
Before your sedum trays arrive, it’s essential to make sure the roof is fully ready for installation. The most important component of any green roofing system is a robust waterproof membrane, which protects your building from moisture.
This membrane — typically EPDM, single ply, asphalt, or fibreglass — must be fully fitted, intact, and watertight before the trays are delivered. Many UK green roof installers recommend arranging this step in advance to ensure your project runs smoothly and safely.
2. Delivery and Unloading
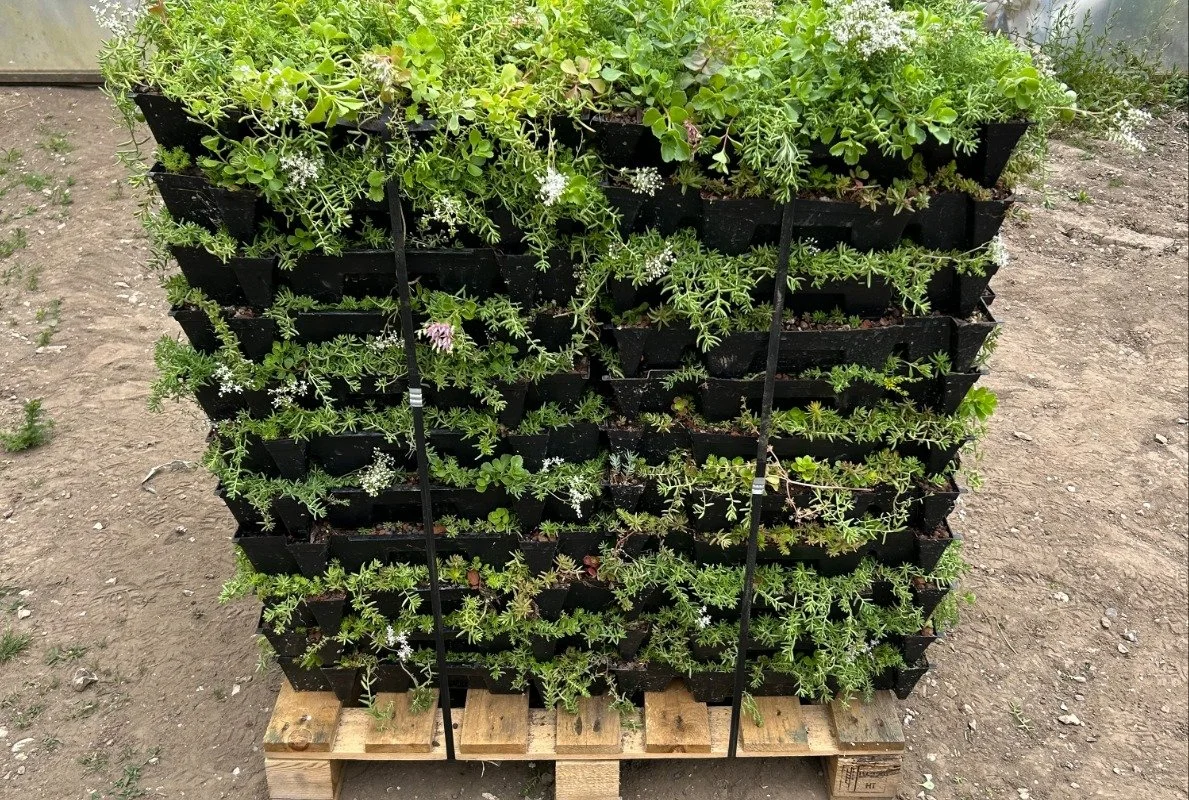
Your sedum roof trays will arrive stacked and strapped on pallets, with each pallet covering approximately 10 m². The haulier will offload the pallets using a tail lift, so no specialist lifting equipment is required.
Use clippers or scissors to cut the pallet strapping carefully. Each tray is lightweight and easy to handle, but the more help you have, the smoother the process — particularly when moving the trays onto the roof.
If access is limited, you may need a step ladder or another safe means of reaching the roof. Handle each tray gently to protect the vegetation and prevent any spillage of growing medium.
3. Preparing the Roof Deck
Before laying the trays, take time to properly prepare the roof deck.
Remove any loose debris such as dust, leaves, or gravel.
Ensure the surface is level, stable, and free from sharp edges that could damage the waterproofing.
Confirm the waterproof membrane is in perfect condition and fully covers the roof area.
If you’ve chosen the additional protection of a geotextile fleece layer, this should be rolled out and laid evenly before installing the trays. The fleece adds an extra barrier between the trays and membrane, helping prevent abrasion and prolonging the life of the roof.
A clean, well-prepared surface provides the perfect base for your green roof build-up and ensures the sedum trays interlock neatly.
4. Moving and Positioning the Trays
Carefully move or hoist the trays onto the roof. It’s helpful to lay them out loosely in their intended positions before interlocking them, allowing you to plan the layout in advance.
Each modular tray features a male and female edge, designed to interlock quickly and securely. Lay the trays perpendicular to one another, clicking them into place as you go. Once interlocked, the combined weight of the trays and growing medium effectively anchors the system, preventing movement from wind or shifting over time.
If you’ve ordered roof gravel or pebbles for the perimeter or around obstacles such as rooflights, vents, or parapets, install these after the trays are in place. The tray edges act as the formwork for the gravel to sit neatly against, keeping the finish tidy and contained.
5. Cutting and Adjusting the Trays

In some cases, you may need to cut trays to fit around roof details, vents, or corners. A standard wood saw works perfectly for this task.
When trimming, always ensure the cut edge faces inward (toward the neighbouring tray) to contain the growing medium. Any spilled material should be cleared away immediately to protect the waterproof membrane and avoid blocking roof drains or outlets.
This is a simple but important part of green roof construction that helps achieve a clean, professional finish.
6. Watering and Establishment
Once the trays are securely in place, water the roof thoroughly. This helps settle the growing medium and gives the sedum a healthy start.
Immediately after installation, the sedum may appear slightly flattened, but it will regain its natural look within two weeks.
While sedum roofs are very low-maintenance, they do need watering once every few days during heatwaves if you want your green roof to look its best. A little care during hot weather will help maintain lush, vibrant vegetation throughout the summer months.
7. Maintenance and Access
Your sedum roof system is designed for durability and minimal upkeep. The trays are strong enough to walk on, allowing safe access for light maintenance.
We recommend checking the roof a few times a year — removing debris, ensuring outlets are clear, and trimming back any overgrowth if needed. With just occasional attention, your living green roof will continue to provide year-round colour, improved insulation, and enhanced biodiversity.
8. Tools You’ll Need
Here’s a quick checklist of tools for your green roof installation:
Clippers or scissors – to cut pallet strapping and to trim the geotextile fleece neatly around rooflights or vents
Step ladder or access equipment – to reach the roof safely
A helping hand (or more!) – the more assistance you have, the smoother installation will be
Standard wood saw – for trimming trays to fit edges or roof details
Water source (hose or watering can) – for post-install watering
That’s all you’ll need — no heavy machinery or specialist equipment required.
9. Enjoy Your New Green Roof
With your sedum trays in place, you’ll instantly enjoy the benefits of a professional-quality green roof system — from improved insulation and rainwater management to a natural burst of greenery that enhances your home or building.
Our DIY green roof kits make it possible for anyone — from homeowners to architects — to install a stunning, sustainable living roof in the UK quickly, easily, and affordably.
Ready to get started?
Contact us today to order your modular sedum trays or to speak to our team about preparing your roof for installation.